> For the complete documentation index, see [llms.txt](https://support.4cast.world/llms.txt). Markdown versions of documentation pages are available by appending `.md` to page URLs; this page is available as [Markdown](https://support.4cast.world/archive-v12-userguide/5.-triggering-your-media/daw-computer-triggering.md).
# DAW / Computer Triggering
This guide outlines the general workflow for using a Digital Audio Workstation (DAW) or sequencer to trigger MVP playback using standard MIDI notes.
***
### 1. Physical Connections
#### A. Control Connection
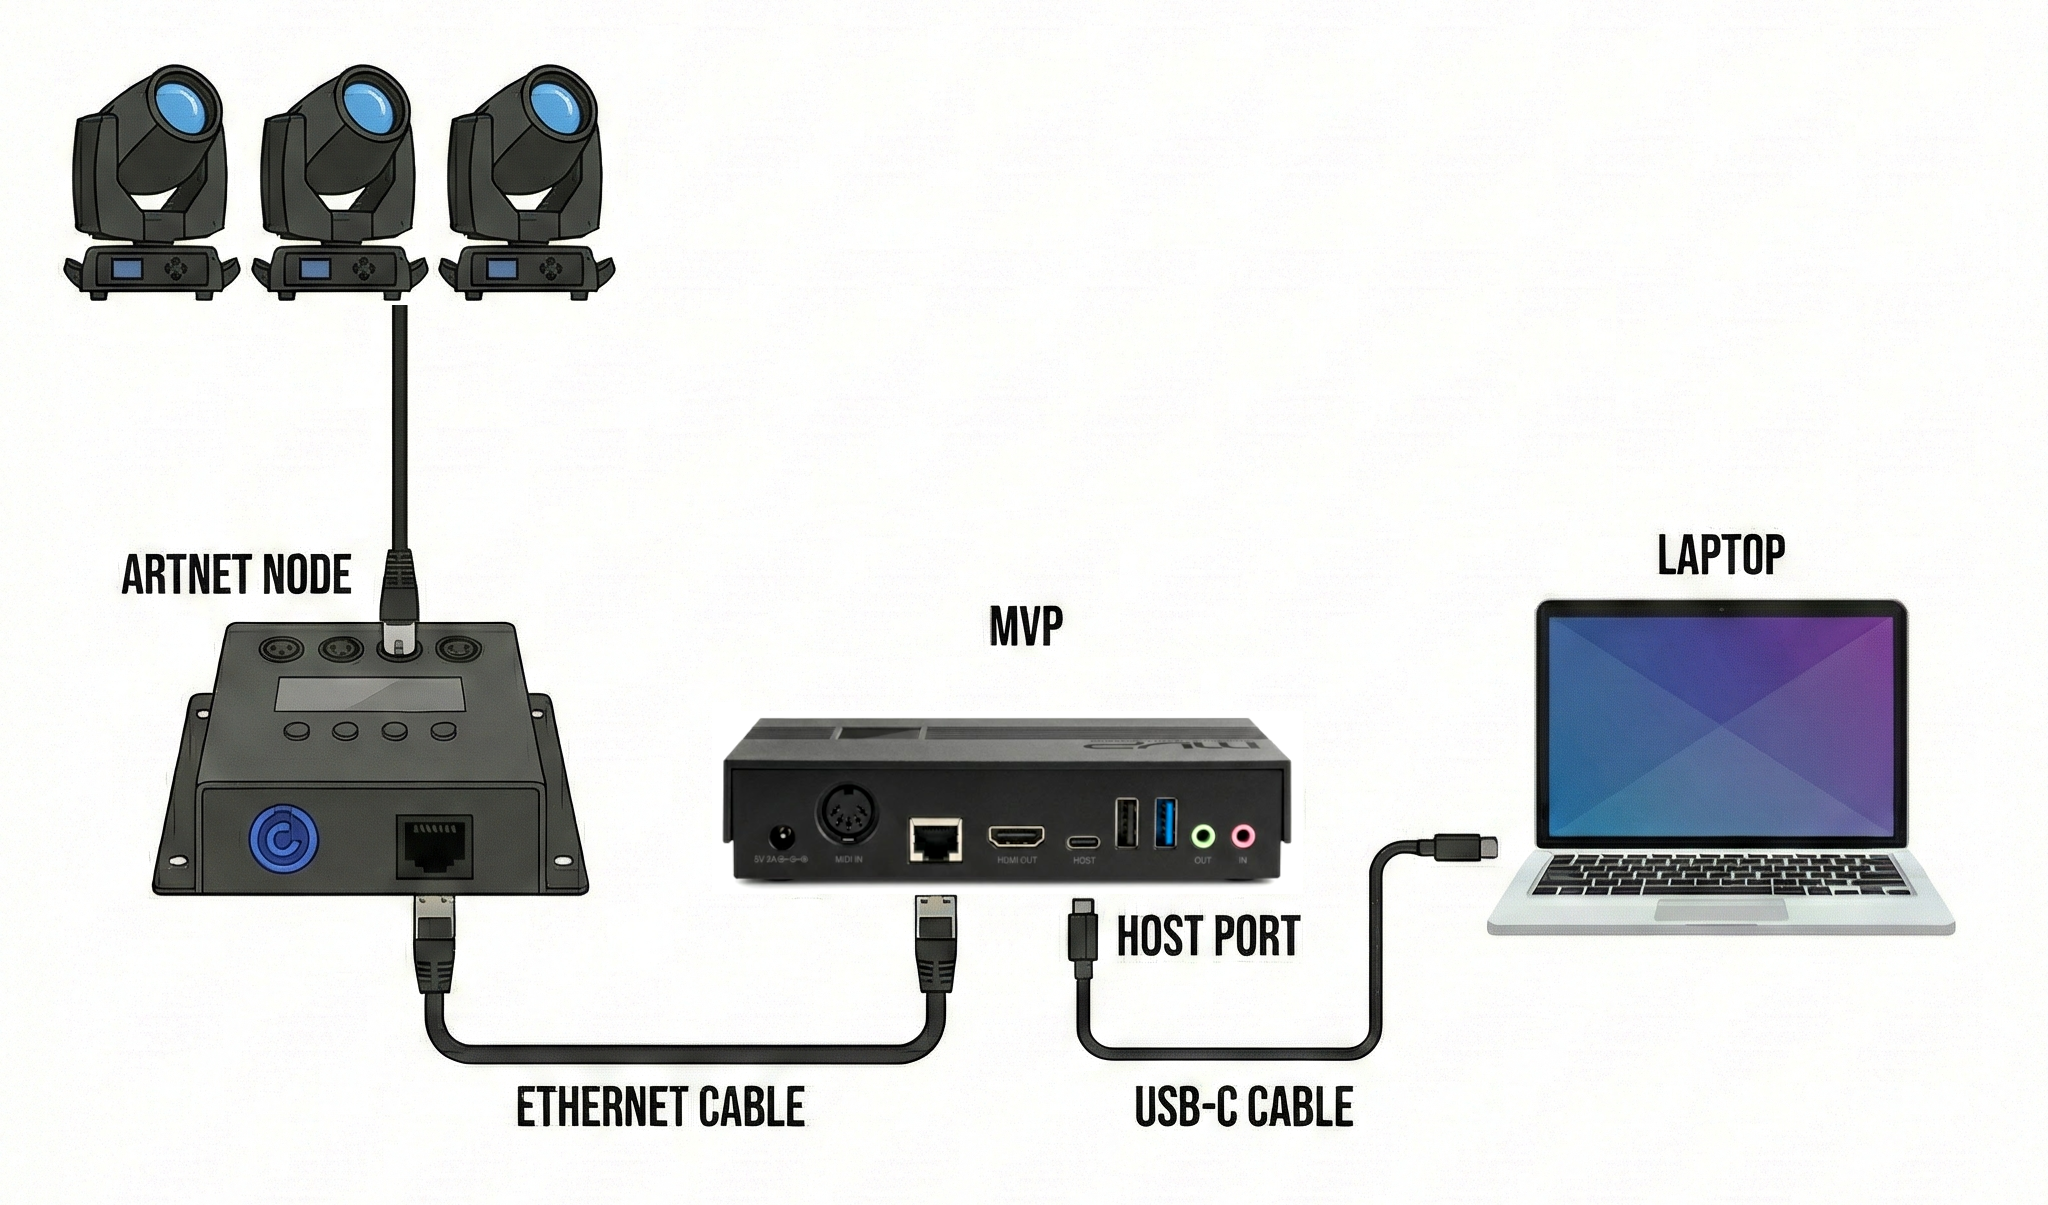
* Computer → MVP: Use the included USB-C cable to connect your computer to the MVP's HOST Port.
* *Note:* The computer provides both power and MIDI data over this single cable.
#### B. Output Connections
* Video: Connect the HDMI Port to your Projector, Video Wall, or TV.
* Lighting: Connect the Ethernet Port to your ArtNet Node or Network Switch.
***
### 2. Wiring Scenarios
Depending on your production needs, your setup will look like one of the following diagrams:
#### Scenario A: Video Playback Only
* Signal Chain: Computer → MVP → HDMI Display
#### Scenario B: Lighting Playback Only
* Signal Chain: Computer → MVP → Ethernet → ArtNet Node → DMX Fixtures
#### Scenario C: Video + Lighting Playback
* Signal Chain: Computer → MVP → HDMI & Ethernet
***
### 3. Software Specific Guides
Select your software below for detailed routing instructions:
* [\[Ableton Live Setup\]](/archive-v12-userguide/5.-triggering-your-media/daw-computer-triggering/ableton-live-setup.md)
* [\[Pro Tools Setup\]](/archive-v12-userguide/5.-triggering-your-media/daw-computer-triggering/pro-tools-configuration.md)
* [\[Logic Pro Setup\]](/archive-v12-userguide/5.-triggering-your-media/daw-computer-triggering/logic-pro-configuration.md)
***
### 4. Trigger Behavior
* Start Trigger: The MVP listens for a Note On message to begin playback.
* Note Duration: The length of the MIDI note in your DAW does not affect playback duration. A short pulse triggers the file just as effectively as a long note.
* Stopping Playback: Stopping the DAW transport does not send a stop command to the MVP. To stop playback, you must trigger the assigned Blackout Note (Default: Note 0 / C-2).